
PostgreSQL is an extremely popular database. While it is great for storing huge amounts of information, this poses an editing problem. With so much data, editing all your content could take days. While you might only find one or two mistakes every couple entries, just one error can change a readers opinion on your credibility. But, with Perfect Tense, you can put editing on autopilot. With this Zapier integration, Perfect Tense will automatically proofread and correct mistakes in any new row in your PostgreSQL database.
Here’s how to set up the PostgreSQL-Perfect Tense:
1. Make sure your Perfect Tense and Zapier accounts are set up (both are free to try).
2. Follow the template below to put proofreading on autopilot with Perfect Tense.
Tutorial:
Click “Use this Zap” to get started. The first page will explain the integration and what apps are necessary. When you are ready, click “Create this Zap”. The template will pre-map most of the fields for you but, this tutorial will help you fill in the rest of the blanks.
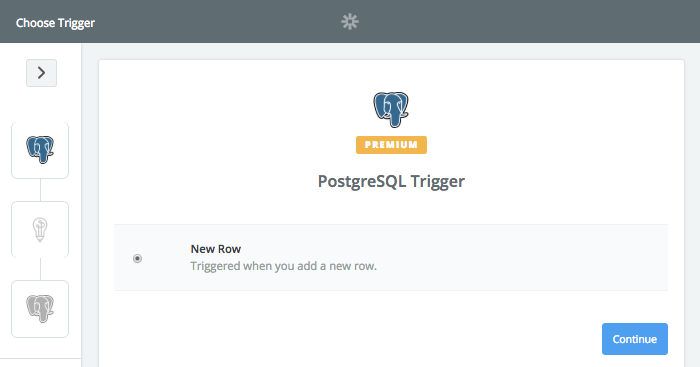
Step 1:
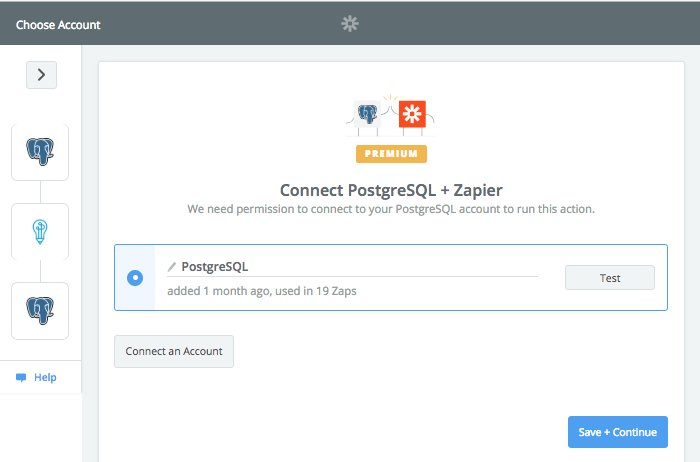
First, you will need to connect your PostgreSQL account to Zapier.
Step 2:
Next, you need to choose the table from your database that you would like Perfect Tense to proofread.
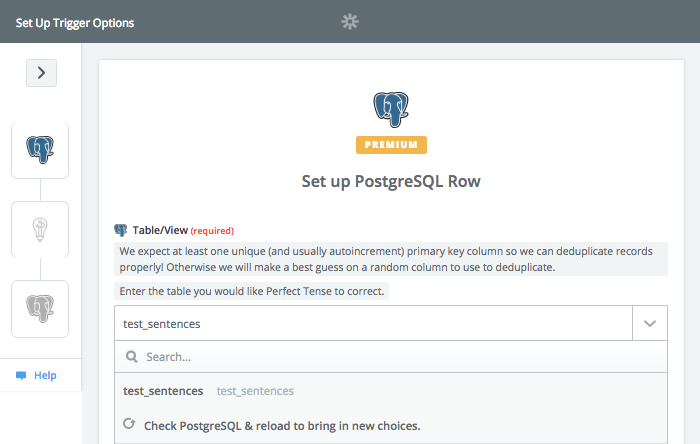
Zapier will then pull in a sample row from your table to run a test case. Once the samples have been pulled, you will be ready for the next step.
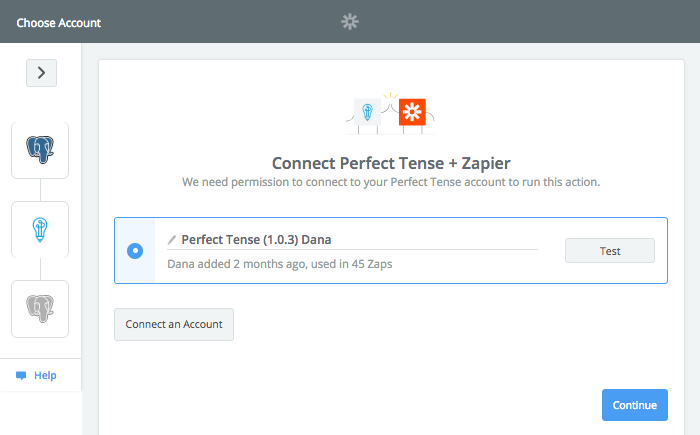
Step 3:
The Perfect Tense action (Correct Text) will be preselected for you; all you need to do is make sure your Perfect Tense account is connected to Zapier.
Step 4:
Once you have connected your Perfect Tense account, you need to choose the rows that you want Perfect Tense to proofread. You should see the title of the column as well as the sample content Zapier pulled earlier.
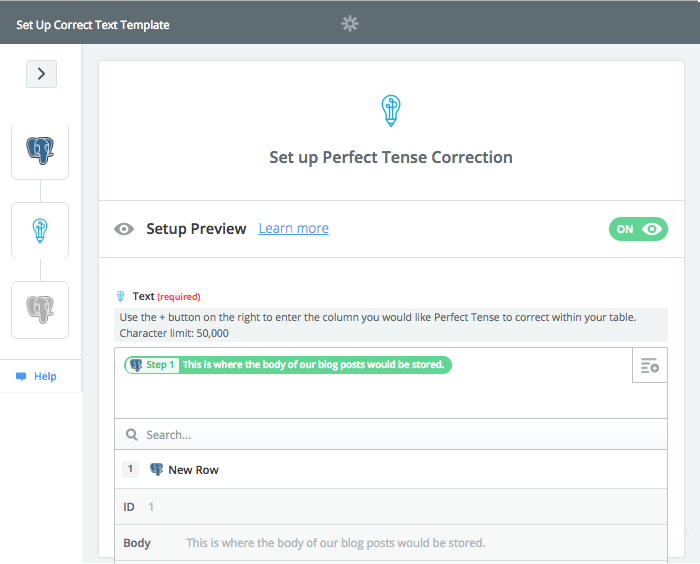
Zapier will send a sample correction to Perfect Tense to make sure everything is functioning so far. Once this test is complete, you are ready to set up the final step.
Step 5:
The action step to update the row will be preselected; all you need to do is make sure the same PostgreSQL account is connected.
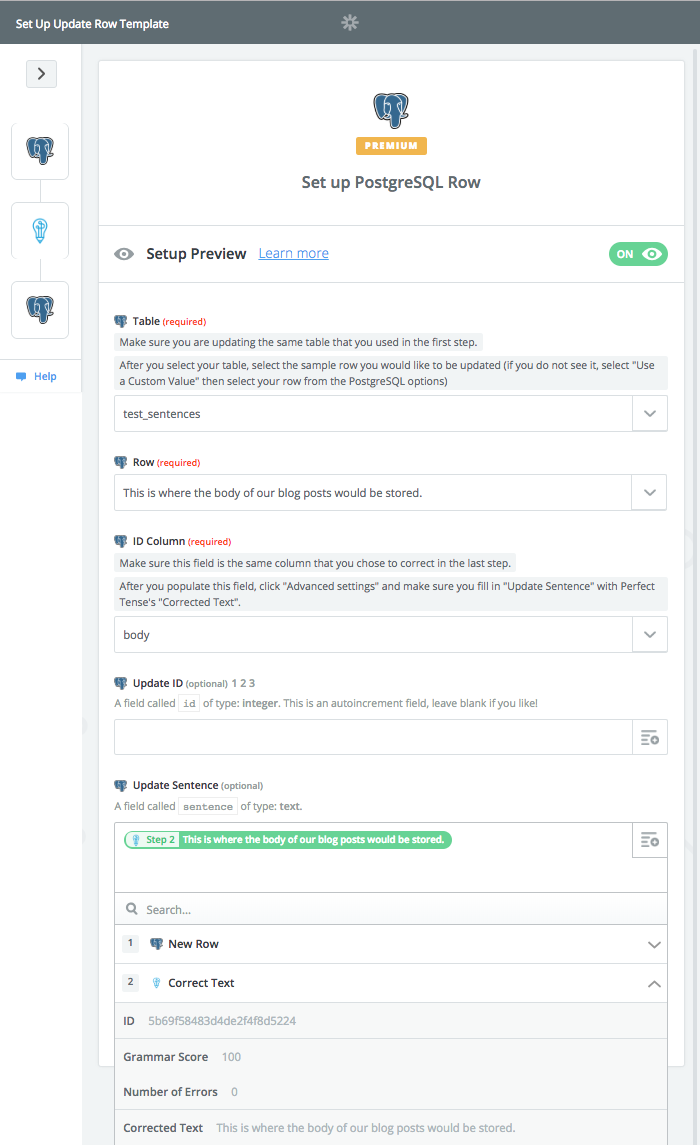
Step 6:
The final step is to fill out how the row should be updated. Because PostgreSQL is a more complicated app to integrate, there are a few things to keep in mind:
Once you have saved these settings, your integration should be all set up!
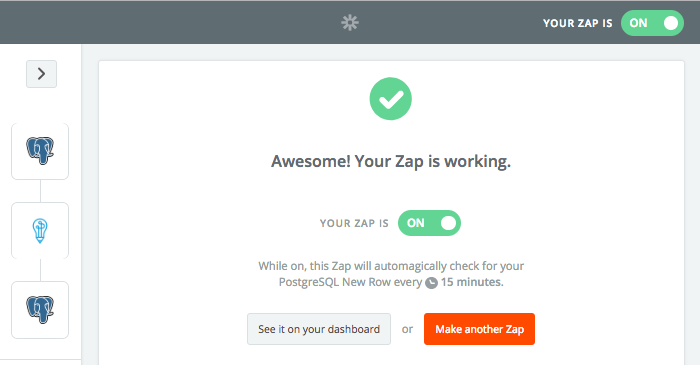
By integrating this template, you can rest easy knowing you have an automated proofreader double checking all your content.