
Having spelling and grammar mistakes in your blog posts can cost you credibility, rankings and readers. While you probably already proofread your posts, mistakes can still make their way into published content. Now, Zapier has an automation that will notify you via Slack if any of your WordPress drafts have spelling or grammar errors. All you have to do is save your post as a draft to trigger the process!
Here’s how to set up the WordPress-Perfect Tense-Slack integration:
1. Make sure your Perfect Tense and Zapier accounts are set up (both are free to try).
2. Follow the template below to get Slack notifications about errors in your MailChimp campaigns.
Tutorial:
Clicking “Use this Zap” will bring you to a page that explains this integration in more depth. Click “Create this Zap” to get started. The template will walk you through the integration and will pre-map most of the steps for you. The following tutorial will help you fill in the rest.
Step 1:
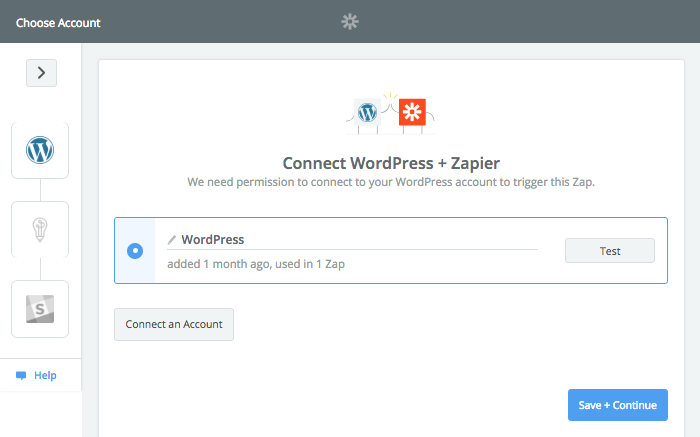
First, you will need to connect your WordPress account to Zapier.
Step 2:
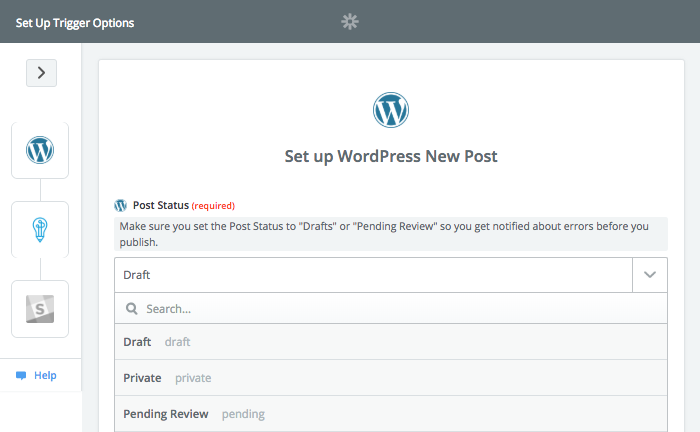
Next, you need to make sure that you are checking drafts by setting “Post Status” to “Draft”. If you would only like your post to be proofread by Perfect Tense once as a draft, we recommend using “Pending Review”.
Zapier will then send a test request to your WordPress account to make sure everything is working properly. You can choose any sample request that Zapier pulls.
Step 3:
The Perfect Tense action (Save File for Editing) will be preselected for you; you just need to connect your Perfect Tense account to Zapier.

Step 4:
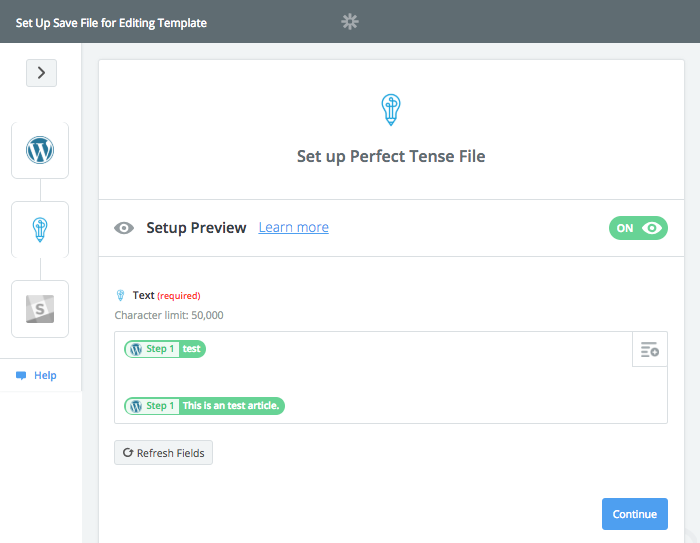
Once your Perfect Tense account is connected, Zapier should have the content section pre-filled as shown below. This will send the title and body of your posts to Perfect Tense for proofreading.
Zapier will send a sample correction to Perfect Tense to test the integration again. Once this test is complete, you can set up the notification step.
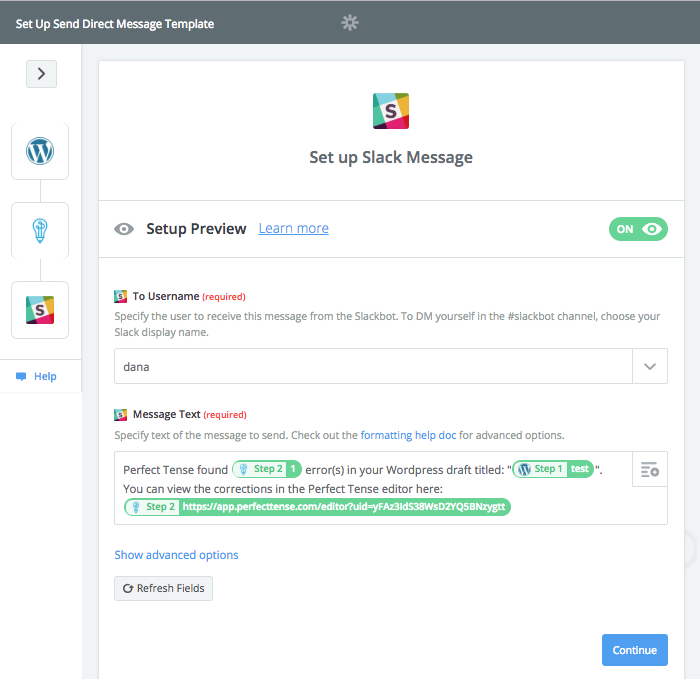
Step 5:
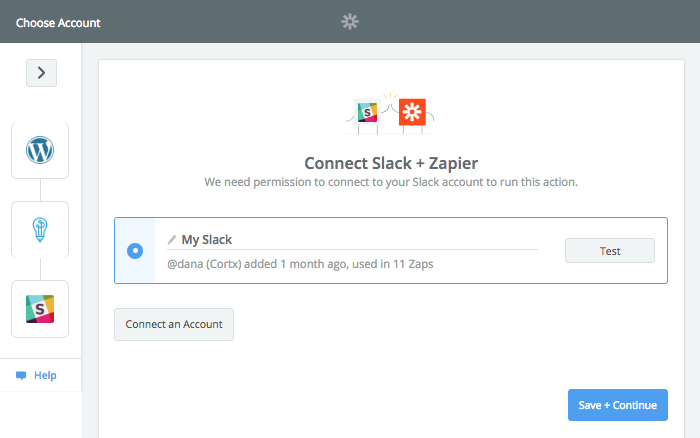
The action step to send a Slack direct message will be preselected; you just need to connect your Slack account.
Step 6:
The last step is to select the name of the person who should get the notifications. The content of the notification should be pre-filled for you. Your notification will include a URL that links to your Perfect Tense account. This will show you all the mistakes and their corrections in the Perfect Tense editor.
Once you have saved these settings, your integration is ready to go!
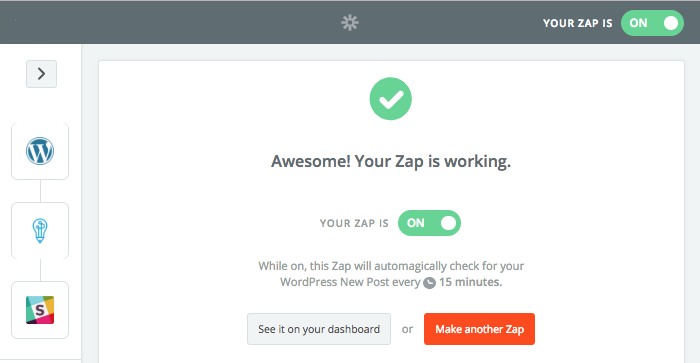
It’s that easy to eliminate spelling or grammar mistakes from your WordPress posts!